About 80% of makeup wearers say glow placement changes how polished their face looks, and that’s why highlighter can make or break the finish. Should you place it on the highest points of your face, you can get a soft lift without harsh streaks. Start with the cheekbones, then move to the brow bone, inner corners, nose bridge, and a tiny touch on the chin or forehead, but the real trick is understanding how to blend each spot so the shine stays seamless.
The Best Spots for a Natural Glow
For a natural glow, start where light already hits your face, because that’s what makes highlighter look believable instead of loud. You’ll usually find your best natural glow zones on the tops of your cheekbones, the brow bone, the inner eye corners, the cupid’s bow, and the bridge of your nose.
These subtle light catching areas help your face look lifted, awake, and softly defined. Put the shimmer above your blush on your cheekbones, then sweep a little toward your temples. Next, touch the brow bone and inner corners with a light hand. After that, add a tiny bit above your cupid’s bow and along the nose bridge.
Whenever you keep the placement precise, you fit right in with that fresh, glowing crowd.
Prep Skin for Seamless Highlighter
Beautiful highlighter starts before the shimmer even touches your face. You want skin prep basics to do the quiet work first. Cleanse well, then smooth on moisturizer so dry patches don’t snag the shine.
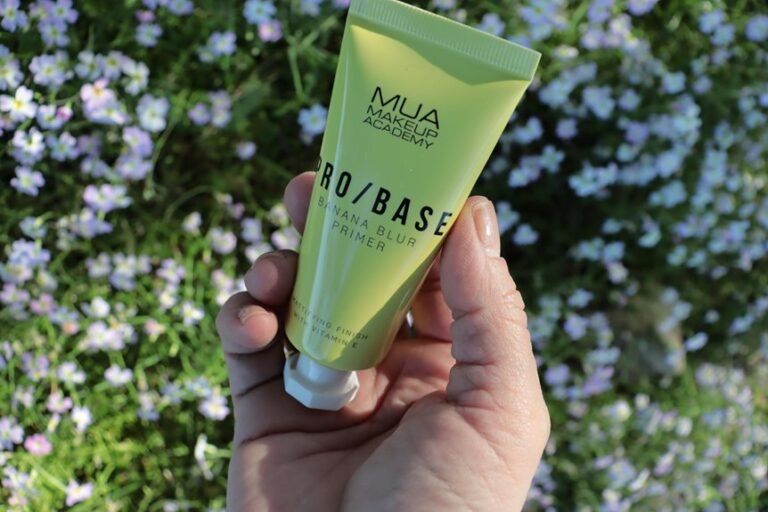
If your skin feels thirsty, add a light hydrating serum, because happy skin lets light glide instead of catch. Next, use priming for glow to even texture and help makeup stay put through the day.
Choose a primer that matches your skin type, and press it in with clean fingers for a soft base. Give each layer a minute to settle, so your highlighter won’t slide or cling. When you prep this way, you don’t just wear glow, you join it.
Focus on the High Points First
Start with the places where light naturally lands, because that’s what makes your face look lifted and fresh. Map your cheekbones initially, then touch the brow bone to open up your eyes, and add a small highlight to your cupid’s bow for a soft, polished finish. As you focus on these high points, your highlighter feels balanced instead of loud, and that’s usually the sweet spot.
Cheekbone Mapping
Whenever you map highlighter on your cheekbones, consider of the high points initially, because that’s where light naturally lands and where your face can look most lifted.
You’ll feel more at home with the glow upon you place it just above your blush, then soften it outward. This gives you bone structure emphasis without making the shine feel loud.
- Mark the top curve of each cheekbone initially.
- Sweep the color toward your temples for a temple blended lift.
- Blend with a light hand so the edge disappears into skin.
If your face shape feels tricky, don’t worry. You’re not chasing perfection; you’re finding your best angle.
A small sweep can make the whole look feel polished, friendly, and naturally yours.
Brow Bone Lift
Because the brow bone sits right under your eyebrow, it can catch light in a way that makes your eyes look more open and rested. You belong in that bright, easy look as you place highlighter on the brow bone arch, then soften it toward the outer edge. Keep the glow small and precise, so it supports a subtle eye lift without shouting for attention.
| Spot | Tool | Effect |
|---|---|---|
| Brow bone | Small fluffy brush | Clean highlight |
| Arch | Ring finger | Soft control |
| Outer edge | Tapered brush | Gentle fade |
| Center bone | Light tap | Bright focus |
| Blend line | Clean fingertip | Seamless finish |
A light touch helps you stay polished and comfortable, and that’s usually the sweet spot.
Cupid’s Bow Highlight
A little glow above your cupid’s bow can make your lips look fuller and more defined, and that tiny spot does a lot of work. You don’t need much to get a polished look that still feels like you. Tap a small amount right on the high point, then soften the edges so the light looks natural.
- Use a highlighter stick or liquid formula for easy control.
- Blend with a fingertip or tiny brush to keep the line soft.
- Pair it with lip contouring for a clean shape and subtle shine.
When you place the glow here, you guide attention to the center of your mouth and help your lips stand out without extra effort. It’s a small move, but it can make you feel put together fast.
Where to Put Highlighter on Cheekbones
Highlighter looks best on your cheekbones when you place it right on the tops of them, just above your blush, so the light can catch the highest part of your face. For cheekbone contouring, keep the line narrow and follow your natural shape.
This gives you a lifted glow placement that feels polished, not heavy. Then, blend the edges toward your temples so the shine melts into your skin. A damp sponge or soft fan brush helps you keep that seamless finish your face deserves.
Whenever you use cream highlighter, you can build the glow slowly and avoid cakey spots. That way, you look fresh, confident, and ready to fit right in, even on an ordinary Tuesday.
Highlight the Brow Bone for Lift
When you want your eyes to look a little more awake, the brow bone is a smart place to add highlighter.
You’re not chasing sparkle here; you’re building a soft brow bone contour that gives lifted eye framing and feels easy to wear. Use a small fluffy brush or your ring finger, then tap a light shade just under the arch and along the highest point.
- Keep the line thin so the glow looks natural.
- Blend the edges into your skin, not over your brow hairs.
- Build slowly until you see a gentle lift.
A subtle touch helps you look polished, bright, and right at home in your own skin.
Where to Put Highlighter on the Nose
Should you want your nose to look softly defined instead of sharply contoured, the bridge is the spot to focus on. Keep your nose bridge placement thin and centered, starting near the inner brow area and stopping before the tip. That small line gives you a fresh glow without making your features feel crowded. Should you want a little extra balance, add a tiny touch at the tip for nose tip definition, but keep it light so it still feels like you.
| Spot | Effect | Touch |
|---|---|---|
| Bridge | Slim lift | Light |
| Center | Soft focus | Blend |
| Tip | Gentle definition | Tiny |
| Sides | More shape | Skip |
| Blend | Seamless finish | Smooth |
This way, you’ll fit right in with a polished, easy glow that still looks natural.
Add Shine to the Cupid’s Bow
You can define your cupid’s bow by placing highlighter just above the center peak of your upper lip.
This little touch catches the light and makes your lips look a bit fuller without going overboard.
Then blend the edges softly so the shine looks smooth, natural, and easy on the eyes.
Define Cupid’s Bow
A touch of shine above the center of your lips can make your Cupid’s bow look fuller and more defined without much effort. You’re not changing your face, just honoring your lip structure and adding romantic lip symmetry that feels like it belongs to you.
- Pick a small dab of highlighter in a soft, skin-like shade.
- Tap it just above the bow, then blur the edges so it melts in.
- Check the shape in natural light and add a tiny bit more should needed.
This gentle placement helps your lips read as crisp and polished, not flashy.
As you keep the glow light, you support the natural curves that already make your smile stand out. That’s the sweet spot: subtle, confident, and easy to wear.
Highlight Center Peak
For a soft, polished glow, place highlighter right on the center peak above your Cupid’s bow, where the lip line naturally rises. This small center peak accent helps your lips look fuller without stealing the spotlight from the rest of your look. Use a light touch, because a little shine goes a long way here. You want peak shimmer balance, not a bright stripe that feels out of place.
A tiny dab in this spot can make your mouth look more defined and put-together, like you belong in every room you walk into. Should you’re aiming for a clean finish, keep the glow focused and neat. That way, your lips catch light in a way that feels natural, friendly, and quietly confident.
Blend For Soft Shine
Once that center peak catches the light, soften the shine so it looks like it belongs there. You want your cupid’s bow to feel like part of your face, not a spotlight. Use feathered blending with a small fingertip or soft brush, then press the edges outward for diffused radiance.
- Place a tiny touch just above the bow.
- Blend it into your lip line with light taps.
- Check the finish in natural light, then smooth any sharp edge.
Keep the glow gentle, and let it lift your lips without looking forced. As you share that subtle shine, you help your whole look feel easy, warm, and included in the same soft glow.
Brighten the Inner Corners of Your Eyes
This small move gives you inner eye brightness and a gentle awake eye effect that feels fresh, not flashy. Choose a light, skin-like shade, because it helps you fit in with that clean, polished glow everyone notices.
Whenever your eyes look tired after a long day, this spot brings them back to life fast. Keep the touch light, and let the sparkle sit close to the tear duct.
That’s where the magic feels easy, natural, and yours.
Where to Put Highlighter on the Chin
You’ve already lit up the inner corners of your eyes, so now it makes sense to keep that fresh glow moving down your face with a touch on the chin.
A soft chin highlight can make your features feel balanced and friendly. Place it on the center point, then blend it outward so it looks like your skin, not a stripe. If you want more jaw definition, keep the glow close to the front of the chin and stop before the sides.
- Use a small dab, not a heavy swipe.
- Tap with a finger or tiny brush for control.
- Soften the edges so your glow fits right in.
That little touch helps you look polished while still feeling like yourself, which is the sweet spot everyone wants.
Use Highlighter on the Forehead Sparingly
Keep forehead highlighter light so your skin still looks natural and balanced. You can focus on the spots where light hits initially, like the center of the forehead or a small touch near the hairline, instead of coating the whole area.
Then blend it well so the shine looks soft, not flashy, and your makeup stays fresh.
Limit Forehead Shine
You want a fresh glow, the forehead needs a lighter touch than your cheeks or nose. You’re not hiding it, just giving it forehead balancing and shine control so your face feels calm and put together. A small sweep keeps you looking polished without stealing attention from the rest of your makeup.
- Tap a tiny amount near the center, then blend outward.
- Keep the edges soft so the shine doesn’t look patchy.
- Use a lighter hand as soon as your skin already looks warm or dewy.
As soon as you treat this area with care, you fit right in with a glow that looks natural, not loud.
That little restraint helps you stay confident, especially on busy days as soon as you want your skin to look friendly, rested, and easy to wear.
Focus On High Points
Because the forehead sits right at the center of your face, it works best with a gentle touch instead of a heavy sweep. You want your highlight placement strategy to honor that spot, not overpower it. Consider of your glow as a soft welcome, not a spotlight crash. A little shine on the high points keeps your luminous dimension balance steady and flattering.
| Spot | Effect | Amount |
|---|---|---|
| center forehead | soft lift | tiny dab |
| temples | subtle frame | light touch |
| brow ridge | gentle catch | sparse |
| hairline edge | open look | whisper |
| centerline | clean focus | minimal |
Blend For Softness
A soft forehead highlight can look fresh and natural, but too much shine can steal the balance from the rest of your makeup. You want the glow to whisper, not shout, so place it lightly along the center or just above the brows. That keeps your face open and friendly, like you belong in your own skin. Then soften the product with a fluffy brush or fingertip so the finish melts in.
- Tap on a tiny amount initially.
- Blur the edges for soft blend edges.
- Check your look in natural light for a diffused highlighter finish.
When you keep the forehead subtle, your cheek glow and eyes stay in harmony. Tiny touches go a long way, and your makeup feels polished, calm, and easy to wear.
Match Placement to Your Face Shape
Your face shape can help you decide where highlighter will look most natural, and that little detail can make a big difference.
With face shape balancing, you’re not changing your features, you’re guiding light where it flatters you most.
Should you have a rounder face, place glow higher on the cheekbones and a touch on the brow bone so your features feel more lifted.
Should your face be longer, strategic proportioning works well while you keep shine near the center of the face, like the cheeks and inner corners, to add width.
For a square shape, soften strong angles by brightening the tops of the cheeks and a little above the cupid’s bow.
Whenever you match placement to your own shape, your glow feels easier, kinder, and more like you.
Choose the Right Highlighter Texture
Powder highlighter can give you a soft, airy glow, while cream formulas often look smoother and more natural on the skin.
You can choose the texture that matches your skin type and the finish you want, whether that’s a light sheen or a more radiant shine.
Whenever you pick the right formula, your highlighter works with your skin instead of sitting on top of it like glitter that got lost on the way home.
Powder Vs. Cream
When you choose between powder and cream highlighter, the best pick usually comes down to your skin, your makeup style, and the finish you want.
If you love quick, airy glow, powder gives you strong powder payoff and works well over set makeup. If you want a softer, skin-like look, a cream finish melts in more easily and feels more natural on your cheekbones.
- Pick powder when you want fast control and easy layering.
- Pick cream when your skin feels dry or you want a more lived-in glow.
- Match the texture to your routine, so your highlight looks like it belongs there.
That way, you don’t fight your makeup. You just wear it with more ease and confidence.
Finish And Sheen
Finish matters because it changes how highlighter looks on your skin, not just how much it shines.
Whenever you choose between finish options, consider about your skin goals and the room you want to fill. A soft pearl gives you a calm glow, while a wet sheen feels bolder and more social. Should you want sheen control, pick cream or liquid textures for a smoother blend, then tap on less and build slowly.
Powder can look airy and polished, but it could read stronger under light. So match the texture to your mood, your skin, and the moment. That way, your glow feels like it belongs to you, not like it borrowed someone else’s spotlight.
Avoid Common Placement Mistakes
Even a little highlighter can go wrong fast, so it helps to know the most common placement mistakes before you start. You want glow that feels like it belongs with you, not on top of you. Many common placement errors happen when you chase shine instead of shape, and avoiding overapplication mistakes keeps your look soft.
- Put it on the high points, not the center of every face area.
- Keep cheek shine above blush, so your lift looks natural.
- Use a light touch on the brow bone, nose bridge, and cupid’s bow.
Next, consider where light would land initially. If you place product too low or too wide, the effect can look heavy fast. A small touch in the right spot helps you look polished, fresh, and comfortably you.
Blend for a Skin-Like Finish
Blending is what turns a bright stripe of makeup into a real part of your skin, so start with softening every edge before you add more product. Use a clean fluffy brush for powder, or tap with a damp sponge for cream. Then work the color into your base with small circles, not hard swipes.
You want skin like radiance, not a stripe that shouts before your smile does. Focus on the tops of your cheekbones, the brow bone, and the inner eye corners, then feather each spot outward. This creates seamless diffusion and keeps the glow looking like it belongs to you.
Should one area feels too strong, press a little foundation over it and blend again. That quiet touch helps you feel polished, natural, and right at home.
Frequently Asked Questions
How Do I Make Highlighter Look Natural on Mature Skin?
You can make highlighter look natural by choosing cream formulas, using a light hand, and blending a seamless highlight placement on cheekbones, brow bones, and inner corners. Aim for mature skin glow, not shine, like a 1920s lamp.
Can I Wear Highlighter Without Foundation?
Yes, you can wear highlighter without foundation for a bare face glow. Choose cream highlight, tap it on cheekbones, brow bones, and inner corners, then blend well so you look fresh, natural, and radiant.
What’s the Best Highlighter for Oily Skin?
Powder formulas are your best bet for oily skin because they act like a lighthouse guiding your glow without flooding your face. You’ll want oil control, a soft matte finish, and a shade that blends so you still feel naturally included.
Should Highlighter Go Before or After Blush?
You should usually apply highlighter after blush for better makeup layering and glow timing, so your blush shows through and you can place shimmer precisely. You will blend everything seamlessly and keep your glow looking naturally lifted.
How Do I Choose Between Cool and Warm Highlighter Shades?
Choose a cool highlighter if your skin leans pink or blue, and choose a warm highlighter if it leans golden. Like Goldilocks, you will want balance. Use shade matching tips and undertone testing so you feel naturally and beautifully included.