Address
304 North Cardinal
St. Dorchester Center, MA 02124
Work Hours
Monday to Friday: 7AM - 7PM
Weekend: 10AM - 5PM
Address
304 North Cardinal
St. Dorchester Center, MA 02124
Work Hours
Monday to Friday: 7AM - 7PM
Weekend: 10AM - 5PM


Understanding the Makeup Basics Guide is crucial for beginners. When you master these fundamental skills outlined in the Makeup Basics Guide, you boost your confidence and feel empowered. The right tools and techniques can make a huge difference in your makeup application. For instance, using the correct foundation type based on your skin ensures a smooth base. Color matching and knowing your undertones are key for a seamless look. Plus, proper application techniques help you achieve an even finish, making your makeup experience enjoyable and rewarding.
Evidence Description | Findings |
|---|---|
Women with higher social self-esteem spend more on makeup | This enhances their confidence in social interactions. |
Makeup is used as a tool for self-presentation | It improves social impressions and helps women feel admired. |
Makeup usage is positively associated with social interaction | Women who use makeup are perceived as more competent and dominant. |
Embrace the Makeup Basics Guide, and you’ll be well on your way to expressing yourself beautifully!
Master the basics of makeup to boost your confidence and express your creativity.
Invest in essential tools like foundation brushes and sponges for a flawless application.
Prep your skin with cleansing, toning, and moisturizing to create a smooth canvas for makeup.
Avoid common mistakes by choosing products that suit your skin type and applying makeup gradually.
Practice regularly and embrace experimentation to enhance your makeup skills and enjoy the process.
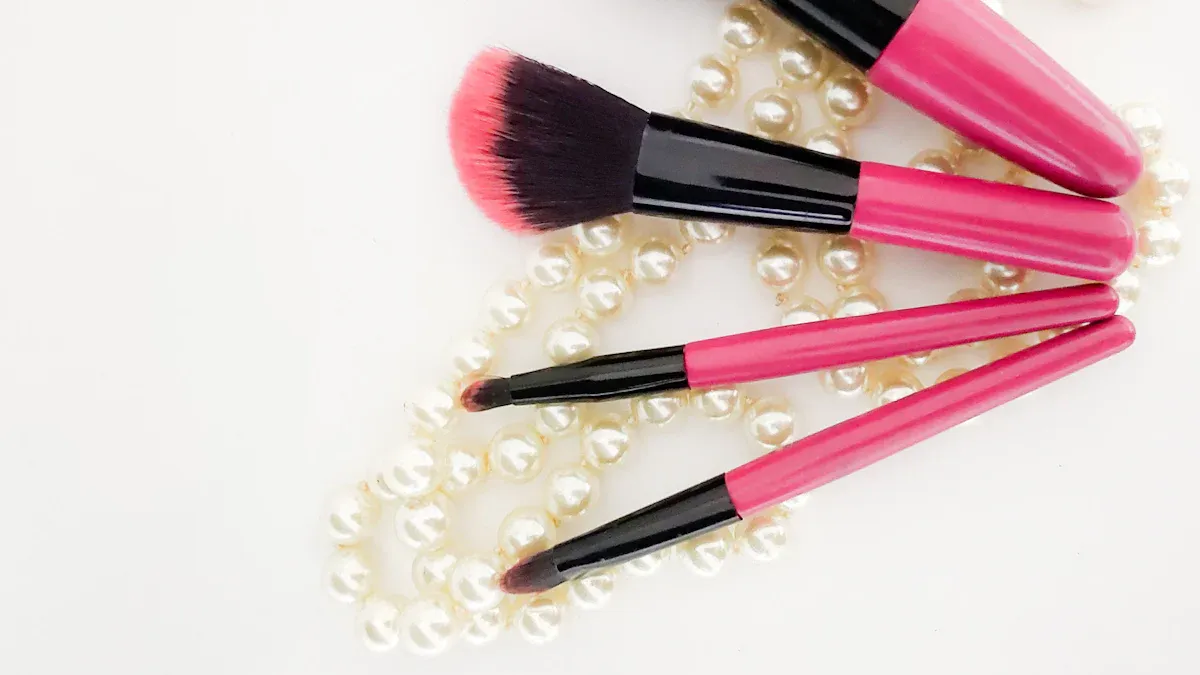
When diving into the world of makeup, having the right tools can make all the difference. Let’s explore some essential brushes that every beginner should consider.
Foundation and concealer brushes are crucial for achieving a flawless base. Here’s what you need to know:
Shape: The shape of your brush affects how you apply your makeup. A dense, flat-top brush works wonders for powder foundations. For liquid or cream foundations, a semi-firm buffing brush helps blend seamlessly.
Bristle Type: Brushes come with either natural or synthetic bristles. Natural bristles excel with powders, giving a soft finish. Synthetic bristles are versatile and often more affordable, making them a great choice for beginners.
Density: The density of the bristles matters too. Denser brushes move product effectively, while loosely packed bristles create a softer look.
To enhance your application, consider using various makeup sponges. Professional artists recommend having different sponges for different products. Dampen your sponge before applying liquid or cream products to avoid streaks and ensure a smooth finish. The right motions and sponge shape can significantly improve your makeup results.
Blush and eyeshadow brushes are just as important. Using the right brush can elevate your makeup game. Here are some tips:
Blush Brushes: A rounded brush allows for easy sculpting and blending of blush. It helps you achieve that natural flush on your cheeks.
Eyeshadow Brushes: Different brushes can impact blending and color payoff. A flat brush is perfect for packing on color, while a fluffy brush is ideal for blending. This ensures even application without streaks or patchiness.
Remember to keep your brushes clean! Regularly disinfecting them helps maintain hygiene and prolongs their lifespan. Clean foundation and concealer brushes weekly to prevent buildup, and wash other brushes at least once a month.
With these tools in your kit, you’ll be well on your way to mastering your makeup application!
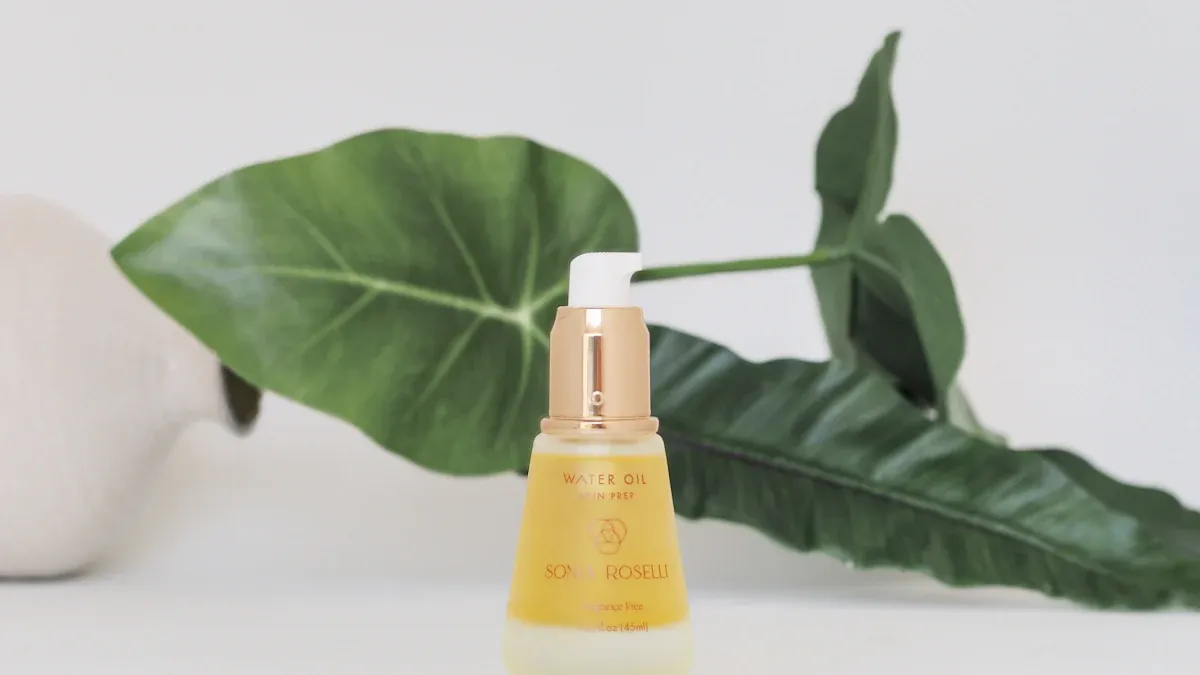
Before diving into your makeup routine, you need to prep your skin. Proper skin prep sets the stage for a flawless application and helps your makeup last longer. Let’s break down the essential steps you should follow.
First things first: cleansing. You want to start with a clean canvas. Washing your face removes dirt, oil, and any leftover makeup. This step is crucial because it helps prevent breakouts and ensures your makeup goes on smoothly. Here’s how to do it effectively:
Start With a Cleanser: Choose a gentle cleanser that suits your skin type. For example, ABÉ & MASON Yudono Cleansing Water is great for sensitive skin, while FRESH Soy pH-Balanced Hydrating Face Wash works well for normal skin.
Exfoliate If Necessary: If your skin feels rough or looks dull, consider exfoliating. Use a product like DR. DENNIS GROSS Alpha Beta® Ultra Gentle Daily Peel to remove dead skin cells.
Use a Toner: After cleansing, apply toner. This step balances your skin’s pH and hydrates it. Toners like BYROE Mini Pro-Berry Pore Refining Toner can help minimize the appearance of pores and enhance the absorption of your skincare products.
Tip: Toners also remove any residual dirt and makeup, hydrate your skin, and restore its natural acidity. They can even improve your skin’s texture!
Once your skin is clean and toned, it’s time to moisturize. A good moisturizer hydrates your skin and creates a smooth base for makeup. Here’s what you should do:
Apply a Moisturizer: Choose a moisturizer that fits your skin type. For oily skin, KORRES Greek Yoghurt Nourishing Probiotic Gel-Cream is a fantastic option. It hydrates without feeling heavy.
Add Some Eye Cream: Don’t forget your eyes! Using an eye cream like GOLDFADEN MD Bright Eyes Dark Circle Radiance Concentrate can prevent your makeup from caking in that delicate area.
Don’t Forget Primer: A makeup primer locks in your products and ensures they last all day. Select one based on your skin type, such as ACE BEAUTÉ Hydrating Face Primer for dry skin.
Finally, apply sunscreen. This step is non-negotiable! Sunscreen protects your skin from harmful UV rays and prevents premature aging. Here’s how to incorporate it into your routine:
Use a broad-spectrum sunscreen with at least SPF 30. Apply it on well-moisturized skin for the best results.
Look for sunscreens with nourishing ingredients like glycerin and vitamin E. These help maintain hydration and improve the overall appearance of your makeup.
Remember to reapply sunscreen every 2 to 4 hours, especially if you’re spending time outdoors. You can use a makeup setting spray with SPF for easy reapplication.
Evidence | Explanation |
|---|---|
Sunscreen should be applied on well-moisturized skin | This practice enhances the overall health of the skin, which positively impacts makeup application. |
Daily use of sunscreen prevents skin dehydration and aging signs | This results in a more radiant makeup look, as less product is needed to cover imperfections. |
By following these skin prep steps, you’ll create a solid foundation for your makeup. Your skin will look healthier, and your makeup will apply more smoothly and last longer.
Applying makeup can feel overwhelming, but breaking it down into steps makes it easier. Let’s walk through the process together, ensuring you achieve a beautiful and natural look.
Start your makeup routine with foundation. This step creates a smooth base for the rest of your makeup. Here’s how to do it:
Prep Your Skin: Make sure your skin is clean and moisturized. Apply a primer to help your foundation last longer.
Choose Your Foundation: Select a foundation that matches your skin type. Liquid foundations work well for dry skin, while powder foundations suit oily skin.
Apply Foundation: Use a foundation brush or a damp makeup sponge. Start from the center of your face and blend outward. This technique helps avoid harsh lines.
Set with Powder: If you have oily skin, finish with a light dusting of translucent powder to keep shine at bay.
Tip: Always apply foundation in natural light to ensure an even finish. This helps you see how the makeup looks in different lighting.
Next, let’s tackle any imperfections. Whether it’s acne, dark circles, or redness, concealing can help you achieve a flawless look. Follow these steps:
Use Primer: Start with a small amount of primer on areas needing extra coverage. This creates an even surface and extends makeup wear.
Apply Color-Correcting Concealer: Use green for red blemishes and peach/orange for dark spots. Dot and blend gently with your fingertip or a small brush.
Use Skin-Tone Matching Concealer: Apply this on spots needing extra coverage. Blend well to ensure it merges seamlessly with your foundation.
Apply Foundation Again: If necessary, lightly apply foundation over the concealed areas to unify the look.
Finish with Setting Powder: Use a light dusting of setting powder to prevent shine and keep your concealer in place.
Now it’s time to add some color! Blush and eyeshadow can enhance your features beautifully. Here’s how to apply them effectively:
Blush Application:
For an oval face, apply blush on the apples of your cheeks and blend slightly towards the temples.
For a heart-shaped face, position blush high on the cheekbones and blend in a C shape towards the temples.
For a diamond-shaped face, pop blush onto the tops of the cheekbones using a stamping method, then blend out towards the ears.
Eyeshadow Application:
Start with a neutral base color on your eyelids.
Use a darker shade in the crease to add depth. Blend well to avoid harsh lines.
Finish with a lighter shade on the brow bone and inner corners to brighten your eyes.
Tip: When applying eyeshadow, use a fluffy brush for blending. This helps achieve a soft, natural look without looking overdone.
By following these steps, you’ll master the art of makeup application. Remember, practice makes perfect, so don’t hesitate to experiment with different techniques and colors!
When you’re just starting with makeup, it’s easy to make a few common mistakes. Let’s dive into two major areas where beginners often stumble: over-application and product selection, as well as ignoring your skin type.
One of the biggest pitfalls is over-applying makeup. You might think more is better, but that can lead to a cakey look. Here’s how to avoid this mistake:
Build Gradually: Start with a small amount of product. You can always add more if needed. This approach helps you achieve a natural look without overwhelming your skin.
Choose Wisely: Select products that suit your skin type. For instance, if you have oily skin, opt for oil-free foundations. Using the wrong products can clog pores and lead to breakouts.
Prep Your Skin: Always cleanse and moisturize before applying makeup. This step creates a smooth canvas and helps your makeup last longer.
Tip: Applying makeup in natural light can help you see true colors and avoid harsh lines.
Another common mistake is ignoring your skin type when choosing makeup products. This can lead to irritation and even exacerbate existing skin conditions. Here’s how to choose wisely:
Know Your Skin Type: Whether you have dry, oily, or combination skin, understanding your skin type is crucial. For dry skin, hydrating formulas work best. If you have oily skin, look for mattifying products.
Hydrate First: Always prep your skin before applying makeup. This step helps avoid dry patches and ensures a smoother application.
Avoid Heavy Products: Using heavy foundations on sensitive or acne-prone skin can aggravate issues. Stick to lightweight formulas that allow your skin to breathe.
By being mindful of these common mistakes, you can enhance your makeup skills and achieve a flawless look. Remember, makeup should enhance your natural beauty, not mask it!
Mastering the basics of makeup is essential for building your confidence and enhancing your skills. As you practice, remember that makeup is a form of personal expression. It allows you to showcase your creativity and individuality.
Here are some effective ways to experiment with your techniques while minimizing waste:
Swap sheet masks for masks in a jar or tube.
Use reusable makeup cloths instead of wipes.
Choose full-sized items over travel sizes.
Buy only what you know you’ll use.
Opt for refillable products whenever possible.
Embrace the fun of makeup! Explore different looks and techniques, and don’t be afraid to make mistakes. Each application is a chance to learn and express yourself.
Finding | Implication |
|---|---|
Framing beauty work as self-expression enhances perceived authenticity | Makeup is viewed as a creative act rather than a means of concealment. |
Self-expression leads to positive word-of-mouth about beauty products | Consumers are more likely to share and promote products when they see makeup as a form of personal expression. |
Lowered authenticity perceptions arise from assumptions of self-enhancement | This suggests that when makeup is seen as a way to conceal rather than express, it is viewed negatively. |
With practice, you’ll find joy in your makeup journey!
Choosing the right foundation starts with knowing your skin type. Test shades on your jawline in natural light. Look for a formula that matches your skin’s needs, whether it’s matte for oily skin or hydrating for dry skin.
You should clean your makeup brushes at least once a week. Regular cleaning prevents bacteria buildup and ensures smooth application. Use gentle soap or brush cleaner, and let them dry flat to maintain their shape.
Yes, you can wear makeup every day! Just remember to prep your skin properly and remove it before bed. This routine keeps your skin healthy and allows you to enjoy your makeup without worries.
Start with a primer to help your eyeshadow last longer. Use a fluffy brush for blending and build color gradually. Don’t forget to highlight the inner corners and brow bone for a bright-eyed look!
Check the product label for terms that match your skin type. Look for “oil-free” for oily skin or “hydrating” for dry skin. Testing samples can also help you find the perfect match for your makeup routine.
